
Connecting to a database#
JupySQL offers several ways to configure a database connection. In this guide, we discuss the pros and cons of each.
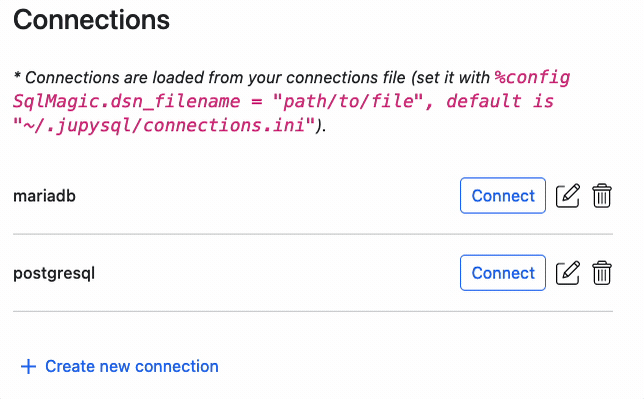
Using the connector widget#
The easiest way to connect to a database, is via the connector widget. To learn more, see: %sqlcmd connect
Connecting with a .ini file#
Changed in version 0.10.0.
Using a .ini file is the recommended way to connect to databases. By default, JupySQL reads the ~/.jupysql/connections.ini file, but you can change this setting. A .ini file looks like this:
[mydb]
drivername = postgresql
username = person
password = mypass
host = localhost
port = 5432
database = db
To learn more, see: Using a connection file.
Connect with a URL string#
Important
If you connect using a URL string, do not hardcode your password in your notebook, see: Building URL strings securely
Connection strings follow the SQLAlchemy URL format.
Database URLs have the following format:
dialect+driver://username:password@host:port/database
In-memory databases have the following format:
sqlite://
duckdb://
Building URL strings securely#
To connect more securely, you can dynamically build your URL string so your password isn’t hardcoded; you can use the getpass function so you’re prompted for your password whenever you want to connect:
from getpass import getpass

password = getpass()
When you execute the cell above in a notebook, a text box will appear and whatever you type will be stored in the password variable.
Then, you can build your connection string:
db_url = f"postgresql://user:{password}@localhost/database"
Create an engine and connect:
from sqlalchemy import create_engine

engine = create_engine(db_url)
%load_ext sql
%sql engine
Important
Unlike ipython-sql, JupySQL doesn’t allow expanding your database URL with the $ character:
# this doesn't work in JupySQL!
db_url = "dialect+driver://username:password@host:port/database"
%sql $db_url
Securely storing your password#
Using a .ini file has the advantage of not having to hardcode your password. However, it’s still stored in a file in plain text. On the other hand, using getpass will always prompt you for your password, which isn’t ideal when running scheduled notebooks.
The most secure way to store your password is to use keyring, a library that uses the operating system credentials manager to securely store your password. The caveat is that the configuration settings depend on your operating system.
%pip install keyring --quiet
Once keyring is configured. Execute the following in your notebook:
import keyring

keyring.set_password("my_database", "my_username", "my_password")
Then, delete the cell above (so your password isn’t hardcoded!). Now, you can retrieve your password with:
from sqlalchemy import create_engine
import keyring

password = keyring.get_password("my_database", "my_username")
db_url = f"postgresql://user:{password}@localhost/database"
Create an engine and connect:
engine = create_engine(db_url)
%load_ext sql
%sql engine
Tip
If you have issues using keyring, send us a message on Slack.
Passing custom arguments to a URL#
Connection arguments not whitelisted by SQLALchemy can be provided with --connection_arguments. See SQLAlchemy Args.
Here’s an example using SQLite:
%load_ext sql
%sql --connection_arguments '{"timeout":10}' sqlite://
Connecting via an environment variable#
Set the DATABASE_URL environment variable, and %sql will automatically load it. You can do this either by setting the environment variable from your terminal or in your notebook:
from getpass import getpass
from os import environ

password = getpass()
environ["DATABASE_URL"] = f"postgresql://user:{password}@localhost/database"
%load_ext sql
%sql
   duckdb://
*  sqlite://
Using an existing sqlalchemy.engine.Engine#
You can use an existing Engine by passing the variable name to %sql.
import pandas as pd
from sqlalchemy.engine import create_engine
engine = create_engine("sqlite://")
df = pd.DataFrame({"x": range(5)})
df.to_sql("numbers", engine)
5
%load_ext sql
%sql engine
%%sql
SELECT * FROM numbers
   duckdb://
*  sqlite://
Done.
| index | x |
|---|---|
| 0 | 0 |
| 1 | 1 |
| 2 | 2 |
| 3 | 3 |
| 4 | 4 |
DBAPI connections#
New in version 0.7.2.
If you are using a database that is not supported by SQLAlchemy but follows the DB API 2.0 specification, you can still use JupySQL.
Note
We currently support %sql, %sqlplot, and the ggplot API when using custom connection. However, please be advised that there may be some features/functionalities that won’t be fully compatible with JupySQL.
For this example we’ll generate a DuckDB connection, using its native connect method.
First, let’s import the library and initiazlie a new connection
import duckdb

conn = duckdb.connect()
Now, load %sql and initialize it with our DuckDB connection.
%sql conn
Download some data
import urllib

urllib.request.urlretrieve(
    "https://raw.githubusercontent.com/mwaskom/seaborn-data/master/penguins.csv",
    "penguins.csv",
)
('penguins.csv', <http.client.HTTPMessage at 0x7f3b19a220e0>)
You’re all set
%sql select * from penguins.csv limit 3
*  '<duckdb.DuckDBPyConnection object at 0x7f3b19a6b7f0>'
   duckdb://
   sqlite://
| species | island | bill_length_mm | bill_depth_mm | flipper_length_mm | body_mass_g | sex |
|---|---|---|---|---|---|---|
| Adelie | Torgersen | 39.1 | 18.7 | 181 | 3750 | MALE |
| Adelie | Torgersen | 39.5 | 17.4 | 186 | 3800 | FEMALE |
| Adelie | Torgersen | 40.3 | 18.0 | 195 | 3250 | FEMALE |
For a more detailed example, see QuestDB tutorial